
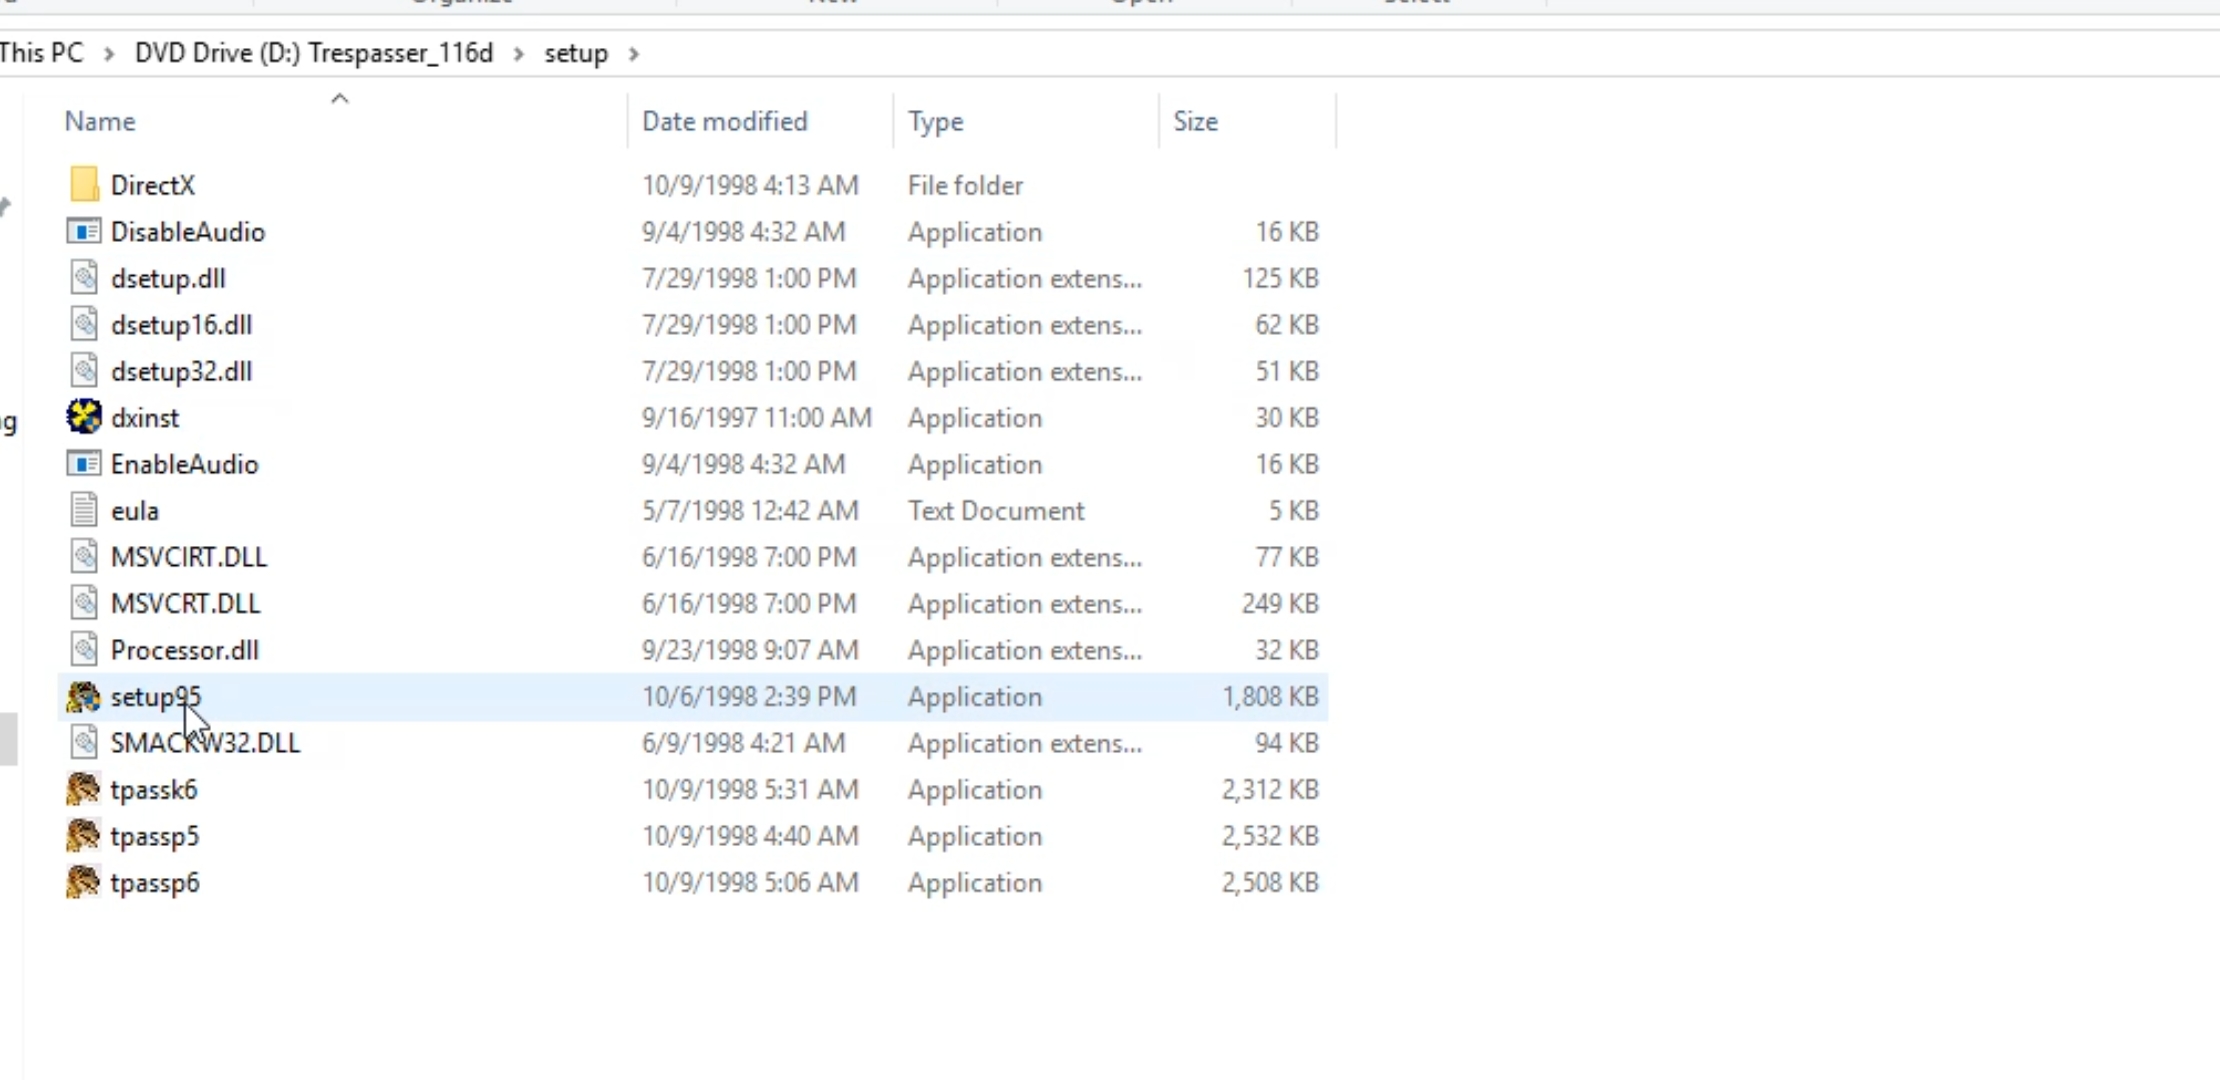
Step 1
Insert CD for Trespasser into your Computer. If you simply click on the Setup within the CD you’ll get a message stating that “This app can’t run on your PC”. To resolve this go into the setup folder and click on setup95.

Step 2
Trespasser will now launch, but most of the icons will be greyed out until we install, so let’s get Trespasser Installed. Click Install then agree to the license agreement.

Step 3
Click Yes to Install DirectX 6

Step 4
Choose where you want to install Trespasser, the default directory is fine. If you keep your games on a different drive though, feel free to move the location. Click Ok on the pop-up stating a directory will be created.

Step 5
Next we have a screen that I haven’t seen for ages that lets you choose how much of the data will be installed on your computer and how much will be streamed from the CD. Since it’s such a small amount I recommend the Maximum Install option for nearly instant load times!

Step 6
The game will now install. The Play icon will now light up and we can test launching the game. You may get a message stating that Direct Draw NOT certified. Just click OK and the game will load.

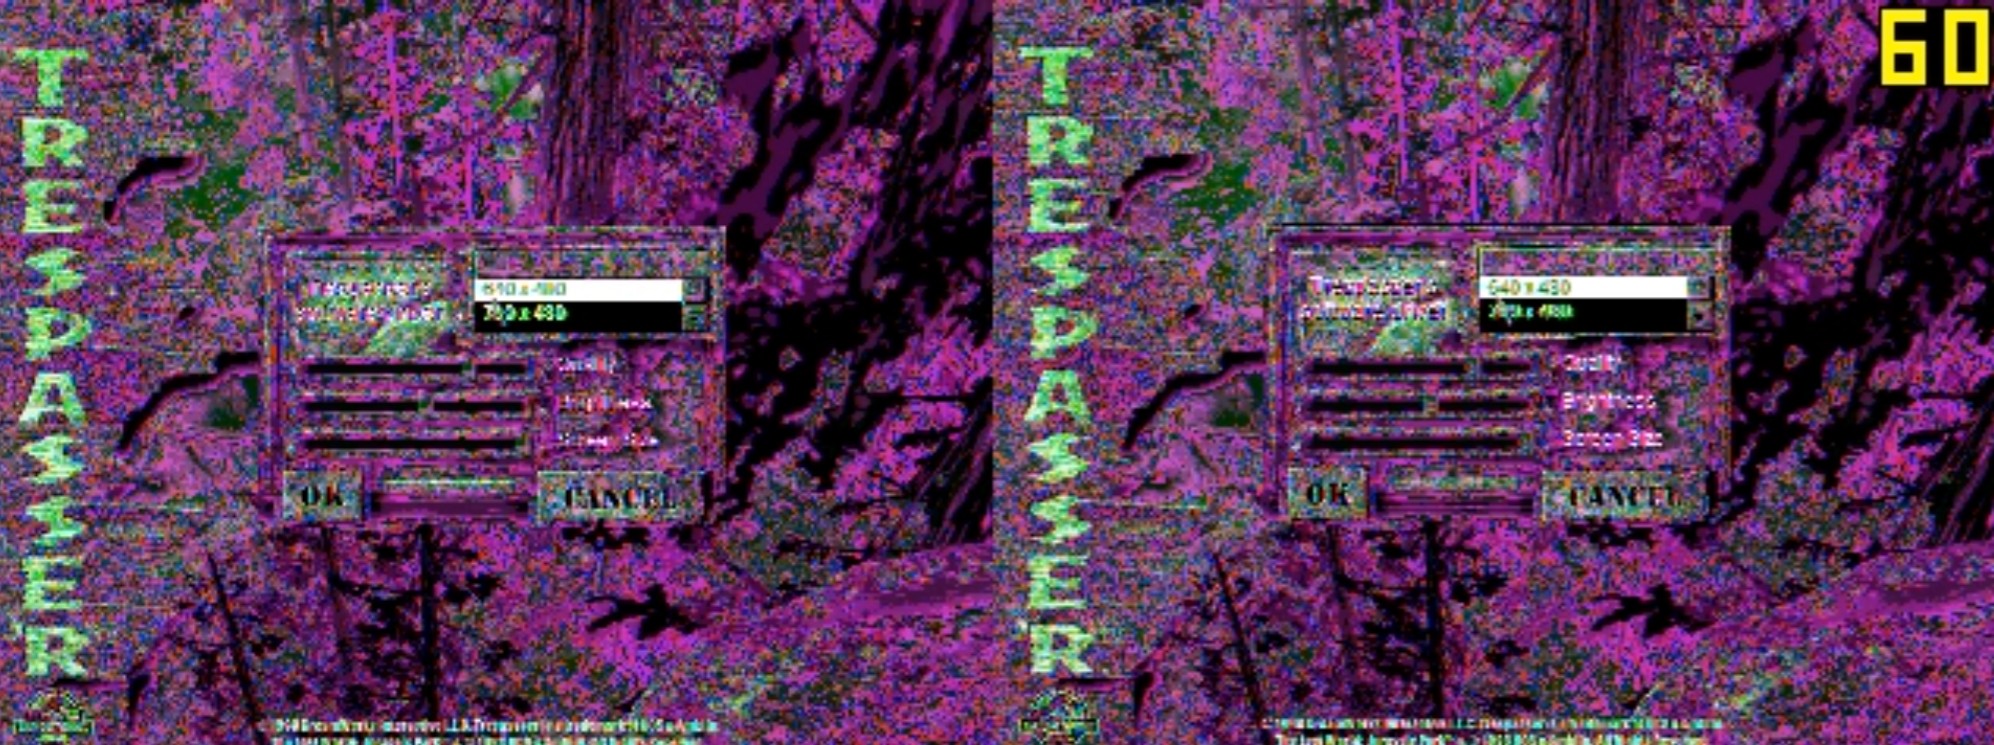
Step 7
The game will load in at a very low resolution and even going to the Options page causes it to freak out. The max resolution I’ve been able to get the base game to switch to is 800×600. To fix this we’ll head to the amazing Trescom.org to get a patch to allow higher resolutions and even better graphics out of Trespasser.
Step 8
In the patches section on Trescom, we want to download the Trespasser CE Patch. I also have a mirror download hosted here incase you can’t access Trescom for some reason.

Step 9
After downloading the patch, extract the contents. Windows has a built-in zip extractor, so just right click on the zip file and click Extract All.

Step 10
Open the folder that contains the unzipped files(By default it will open itself). Next open another folder and navigate to where you installed Trepasser to in Step 4. In Windows 10 you can drag a window to the edge of your screen to snap it to the right or left half of the screen. Do this for these two folder windows to get a setup like in the below screenshot. This will make it easy to copy our patch files to their destination.
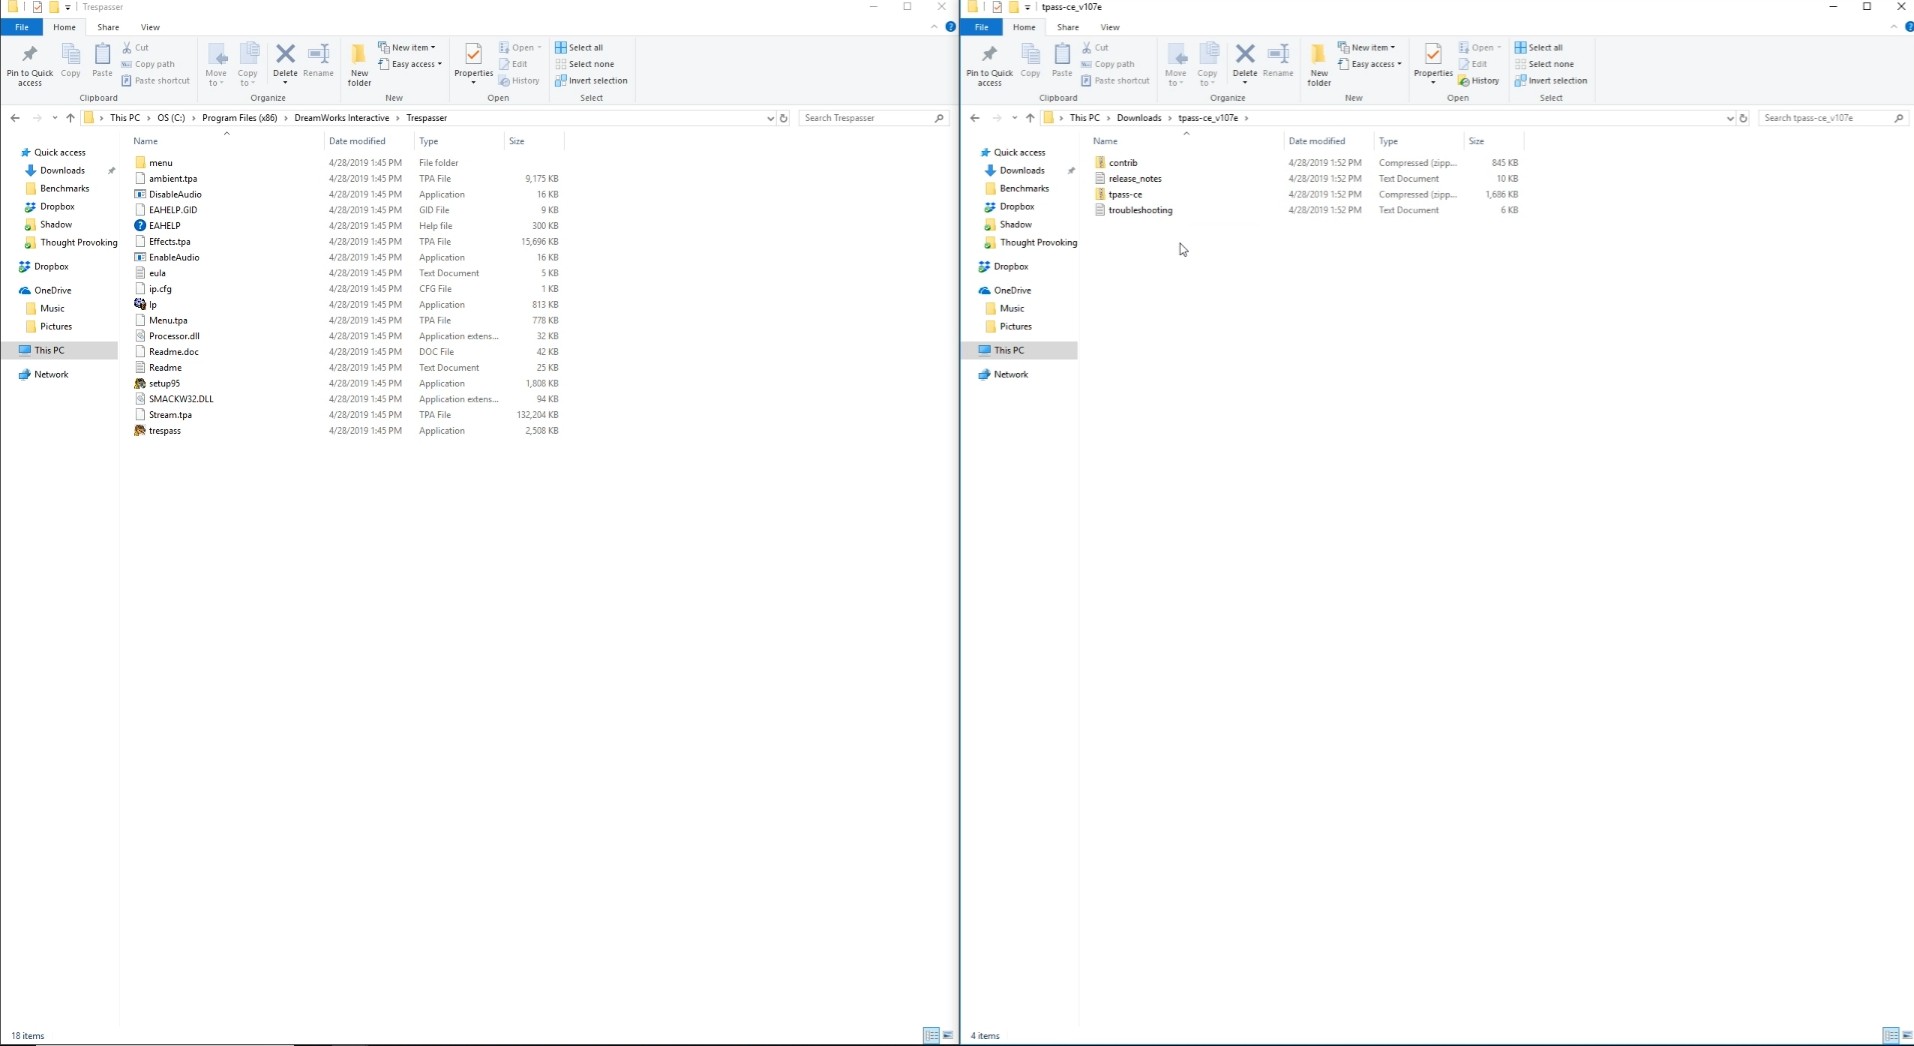
Step 11
In the Trespasser CE folder there is another zipped folder called tpass-ce. Extract it and then open the folder. You will see a folder and two files, copy these to the Trespasser install folder.
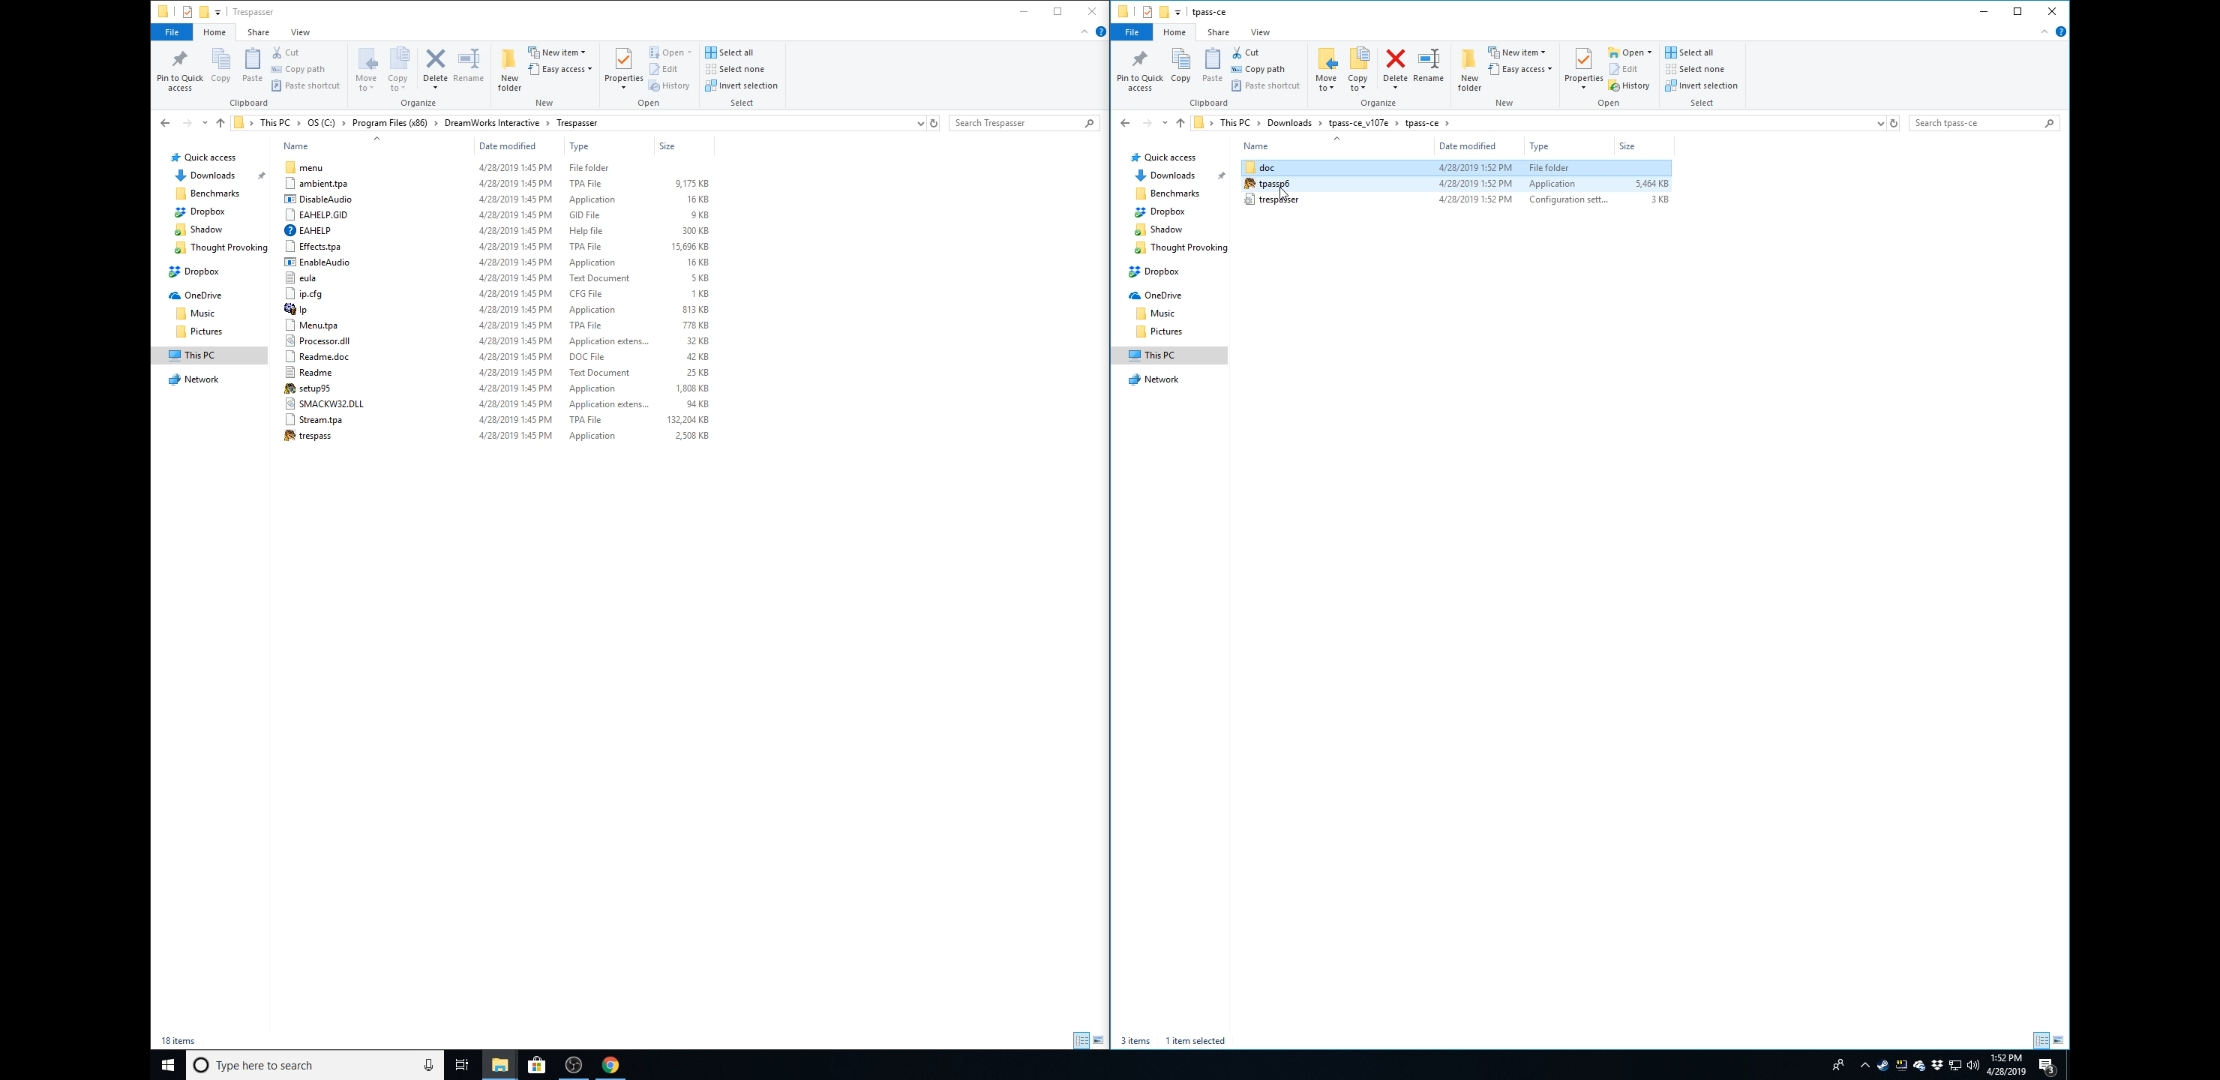
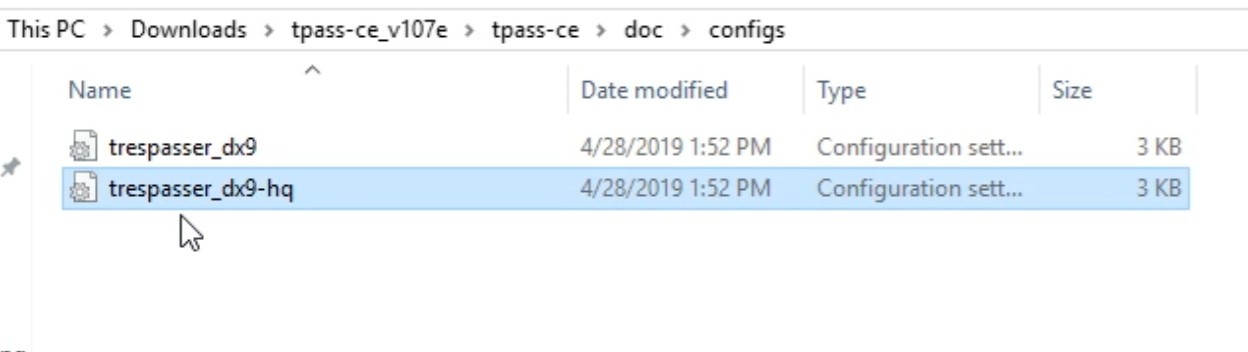
Step 12
Next click on the doc folder and then the configs folder. Here you will find two config files ready for use. Unless you have a very old PC then you should be fine to run Trespasser at max quality. We’ll want to copy the trespasser_dx9-hq file to the Trespasser install folder.
Step 13
You will now have two config files in your Trespasser install folder. Delete the file named trespasser. Next rename trespasser_dx9-hq to trespasser.

Step 14
To run the game you’ll now need to run the tpassp6 application. You can right click on this to create shortcuts if you want. When you launch this application it will bring up the SmartScreen prompt. Click More info, which will then show a button that will allow you to run the game.

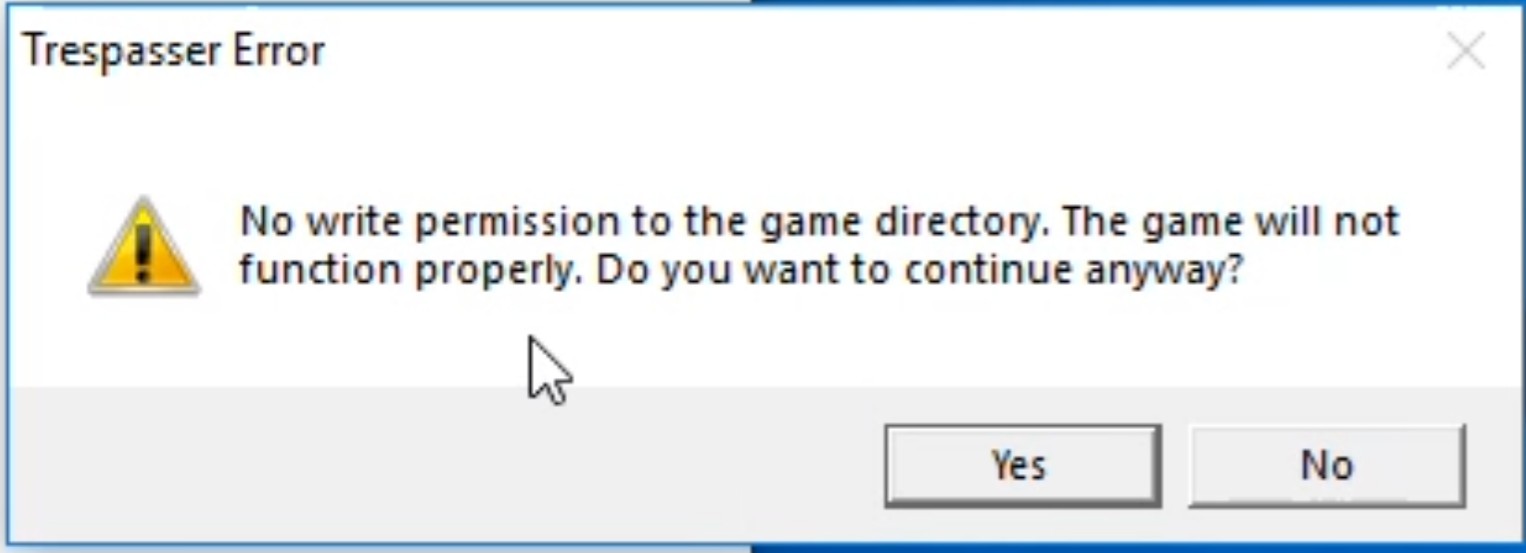
Step 15
You may get an error that says you don’t have write permission to the game directory. If you do get this error you will need Admin rights on your PC to fix this. If you don’t get this error then skip to Step 16.
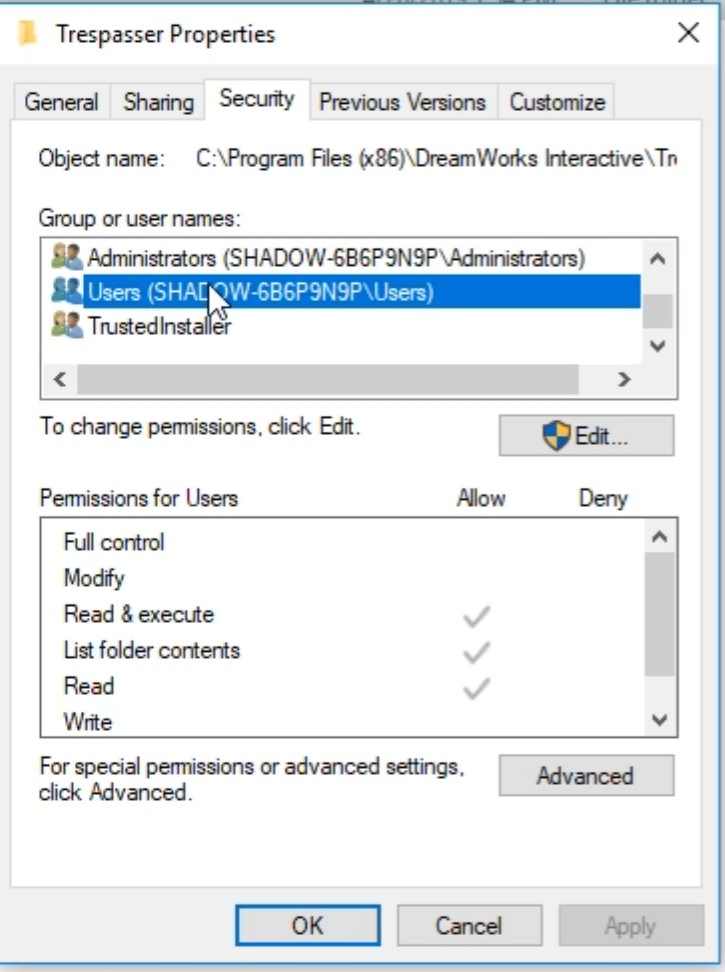
Step 15-B
Right click on the tpassp6 application and select properties. Then go to the Security tab. You will see a group called Users, this is what we’ll be editing. Click the Edit button to make our required change.
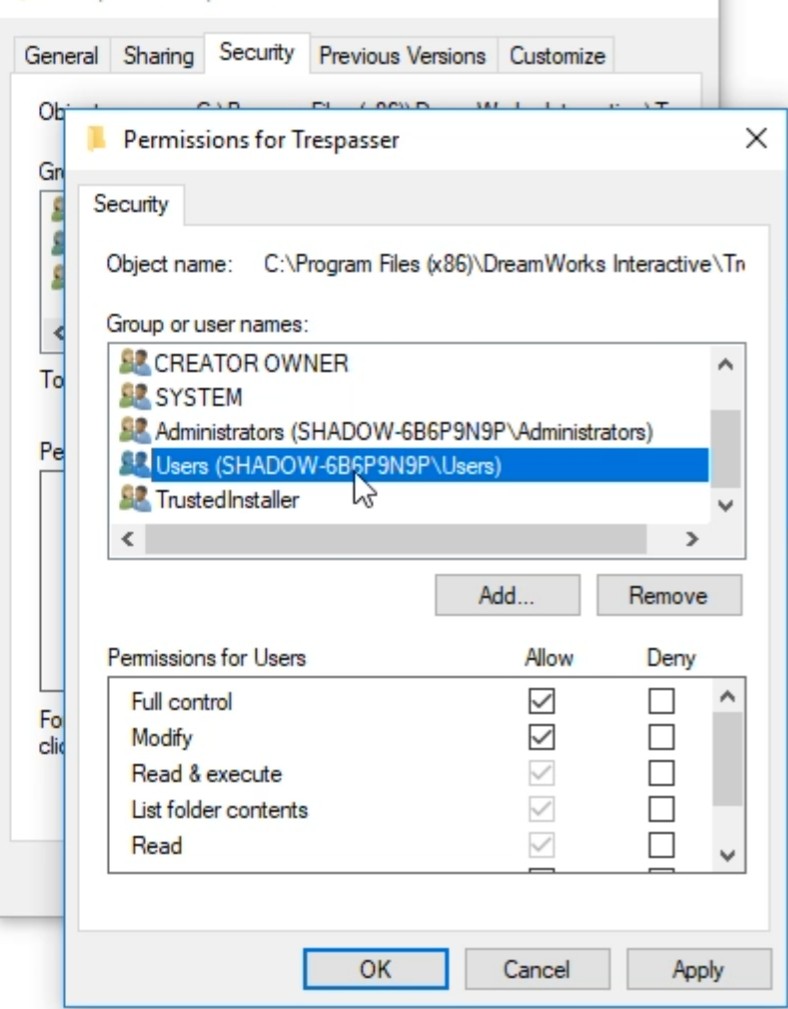
Step 15-C
A permissions window will pop and you can give the users full control to the install folder. If you do share a PC with others you may consider adding just write access which is at the bottom of the list. I’ve never had any issues with granting full control though so that is my default method.
Step 16
The game now launches and we should be ready to play. You can now navigate to Options then go to the video section without the graphics going wonky. If you still have any issues such as your resolution not showing up click the button above the resolution window that says: “Select New Video Driver”.

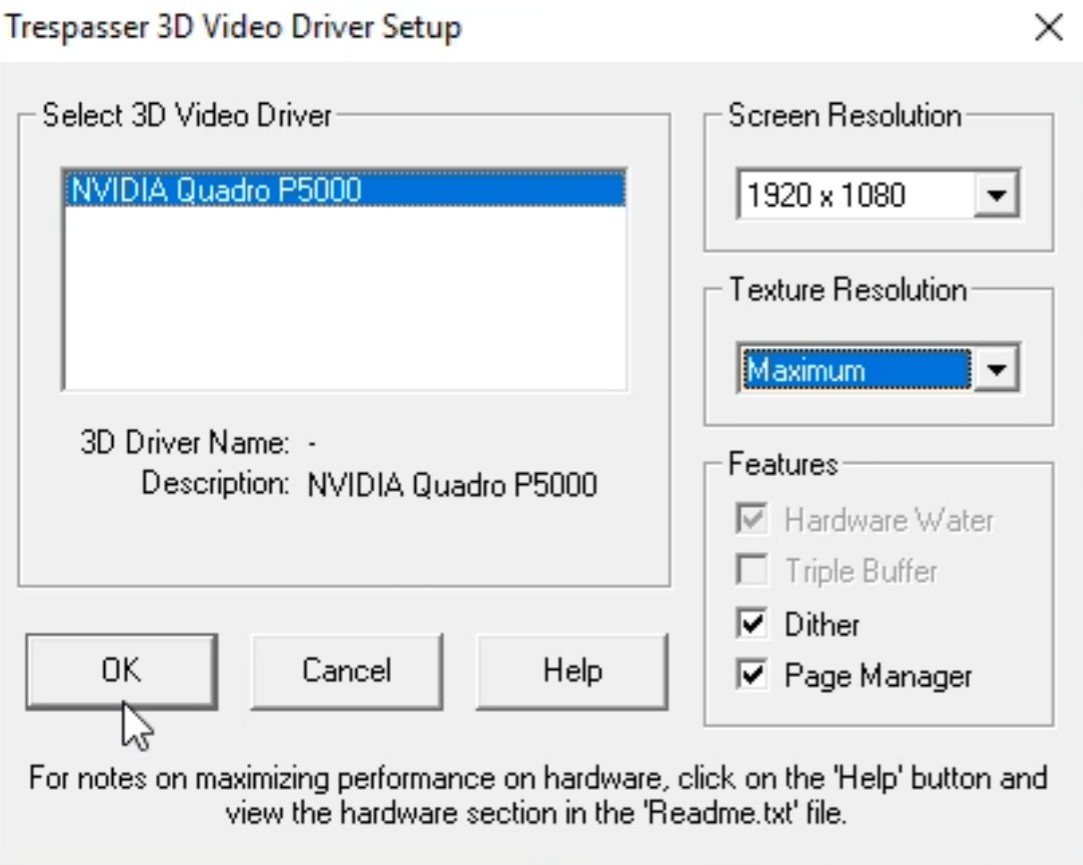
Step 17
With the Trespasser Driver Setup too you can change your driver if required, adjust resoluton, and texture resolution.
Step 18
You’re now ready to play! Enjoy!
![Sorna Short Film Series [Fanmade]](https://jurassic.report/wp-content/uploads/2024/01/screenshot-2024-01-14-163951.png?w=1024)


Leave a comment